
Amazon sellers have it easy. After creating your Amazon seller account it is just a matter of posting some products up on Amazon and within minutes you can already have sales coming in.
Setting up your store on Shopify is going to take more work, but don’t be afraid we are here to walk you through the process.
In the post we have the ultimate Shopify setup tutorial covering all of the bases you need to launch your first Shopify store.
Branding
Most Shopify tutorials don’t focus on some of the items you need to have in place before logging in to Shopify.
So let’s first talk about your business branding assets.
With selling on Amazon or eBay they are doing the marketing for you as they bring an audience of millions every day looking for things to purchase, so your own branding & marketing is not crucial.
Selling on Shopify is a different ballgame.
Nobody is going to help you with marketing or getting your store and product listings discovered.
That is your job now.
But don’t think of it as a job, this is also a huge opportunity to take your reselling business to new heights.
The greatest and most resilient brands feed off of their brands, so now it is your turn to put on your creative hat (or hire one).
Register a Domain Name
Do you already have a name for your business? Do you have a matching domain for it?
Now is time to research domain names and register one.
Domain Research
There are many great tools for finding domains. Below are a few of my favorites.
Domain Registering
Don’t waste money overpaying for your domain name. Services such as Namecheap or Google Domains can help save some money.
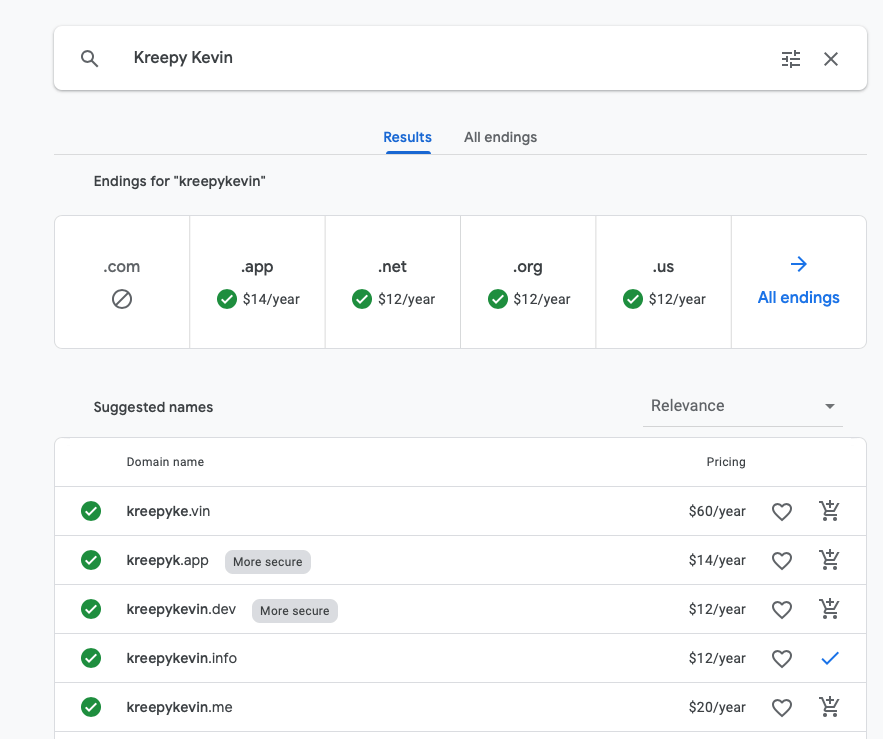
Google Domains has a nice interface for doing domain research and you can also register from there as well.
Logo
You are going to need a logo to use for a few different stylistic elements of your Shopify store.
Do you already have one? I made my own in Photoshop.
One of my favorite ways of getting a quick and nice logo is via 48 Hours Logo. I have used this service several times without fail.
I suggest bumping up your price to $200 or so for a logo design to attract the better designers. Also do some thinking ahead of time about what colors and logo styles you want.
Once you have a logo in place you should have some ideas of colors that you want to use as part of your core brand style.
With a logo and domain name in place, we can start dig deeper with our Shopify tutorial to go over Shopify settings.
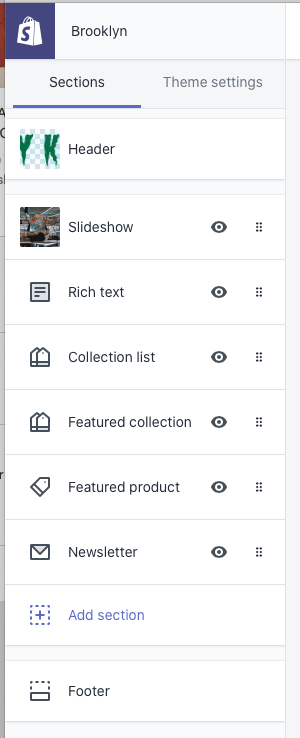
Shopify Theme
You’re just getting started here, so don’t overthink this. Just go with a free Shopify theme.
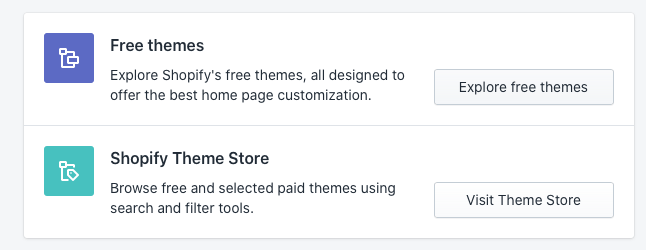
You can always change this later to a premium theme once you have a better idea of how you want to put your Shopify store to use for your business.
You can browse around the Shopify theme stores to see these in action and learn more about the features for all of the plans.
Here is a direct link to view the free Shopify themes.
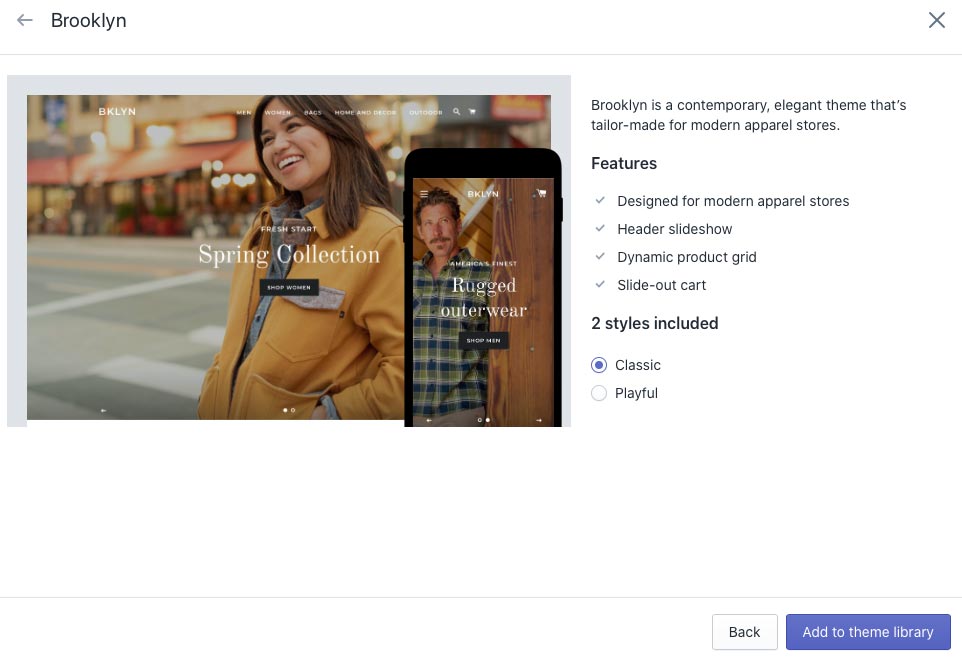
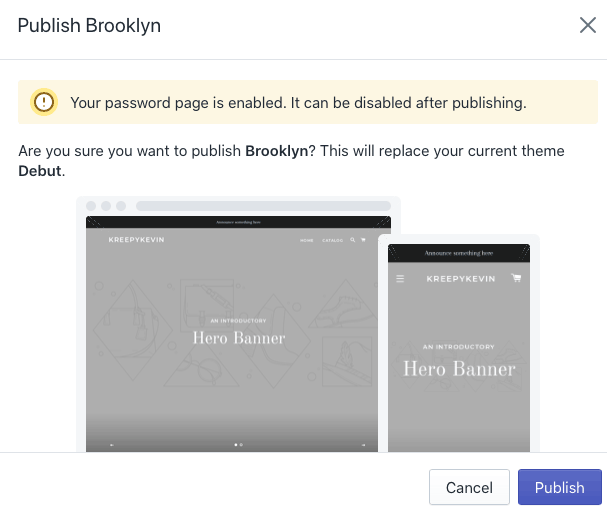
I am building an online record store called Kreepy Kevin’s — so I need a bold theme.
The Brooklyn theme looks like one I can have some fun with. Just click on the blue add to theme library button.
And now activate that theme.
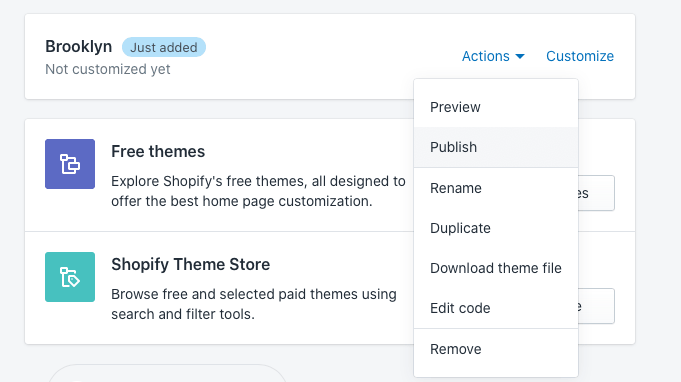
And verify that you want to activate that theme by clicking publish.
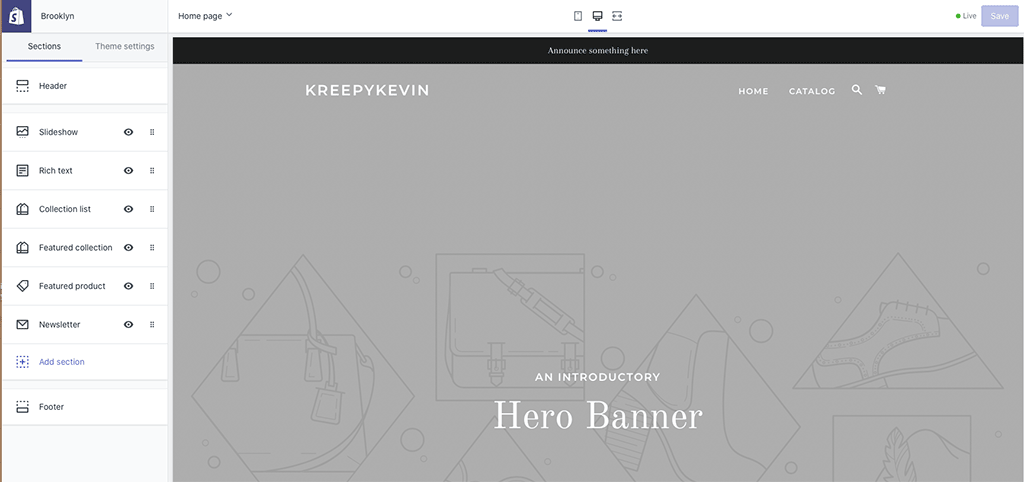
Setting Theme Settings
Now that our Shopify theme is intact, we can get going on adding some branding flavor to the theme.
There is a lot here and we will walk through it all.
First off note that there is documentation on this theme (and others) by Shopify. The Brooklyn documentation for example is available at https://help.shopify.com/en/manual/online-store/os/using-themes/themes-by-shopify/brooklyn.
So find documentation for your theme and keep it handy to make your Shopify theme customization simpler.
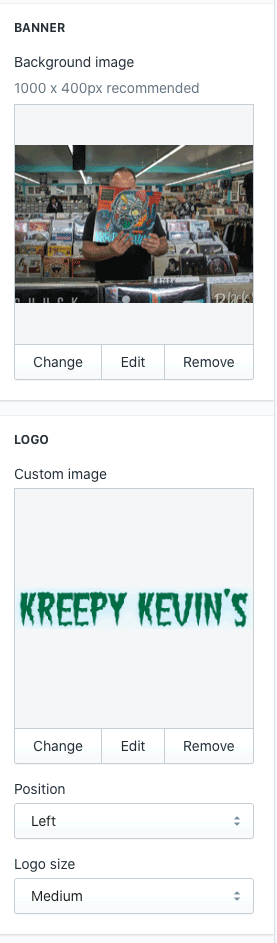
Header
The header is very top part of the store site. The first element we will customize is the logo.
Click select image and then you can either use something already in your Shopify images library or upload a new image.
Note the slider to increase the size of your logo. I want mine to be a bit bigger than the default size.
One more thing to do in the header logo section is to turn off the transparent header. I want my logo and top menu to rest on top of some nice white space and not be layered on top of my giant home page image.
So I have unchecked that.
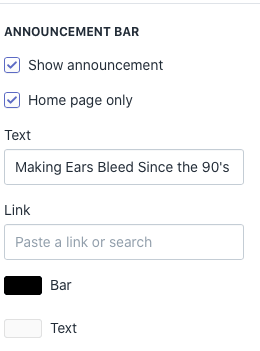
One last thing on the bottom is I want to have an announcement bar on top just so people know what the store is all about. The name Kreepy Kevin’s does not exactly make it clear this is a vintage vinyl record store.
While this is called the announcement bar, I am using it for my tagline instead.
So this is what we have accomplished in the header section. I like where this is going.

Slideshow Settings
The slideshow images are giant images that shoppers will see on the home page.
You can have multiple images to present different sections of the store, but I am keeping mine simple.
I just want one image with no text overlaid on top either. I want my image to stand alone since it has some branding within it.

I went ahead and deleted the other slide that was in there by default and now I am set.
Click on the blue save button on the top right and let’s see how my Shopify store is coming together.
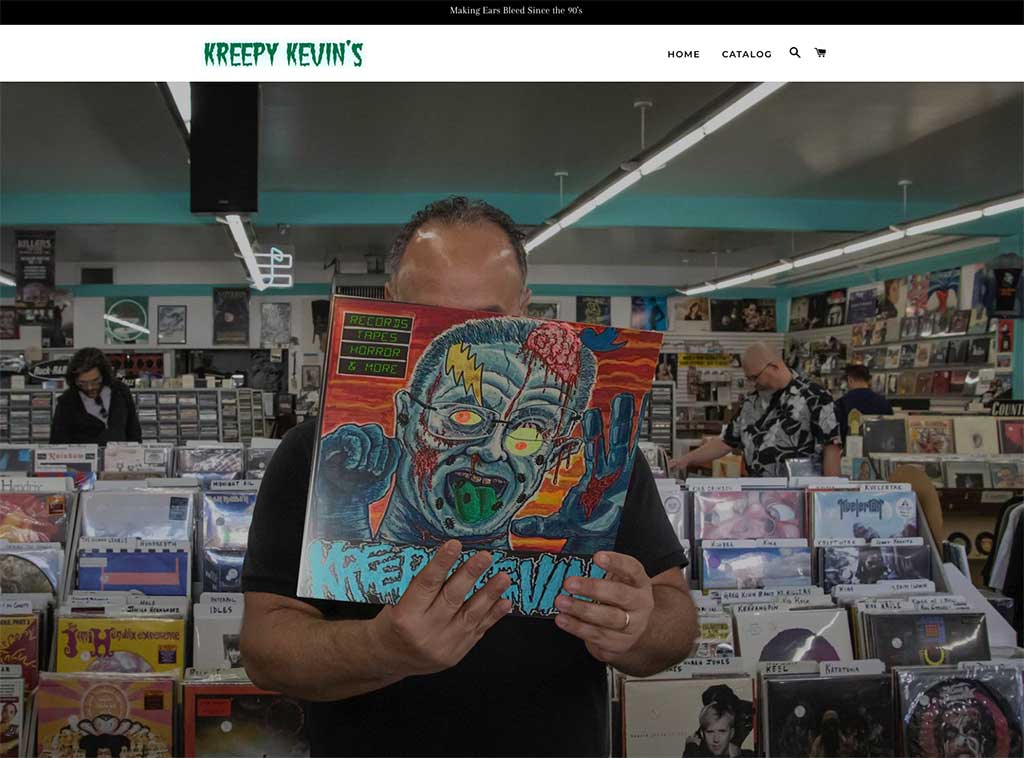
This is encouraging. It is already showing so much more personality than anything I could do on Amazon.
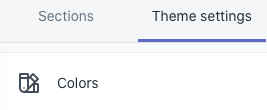
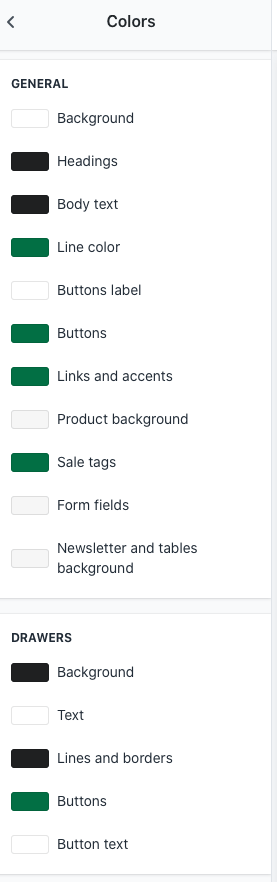
Colors
Determining your colors is a key part of your branding image. Remember that like many things in the art of design — less is more.
Go to the theme settings up top and choose colors.
Consistency is important in design, so I am using the same green from my Kreepy Kevin logo.
I replaced the default brownish color for links, buttons, and sale tags with my green. That should give me the flavor I am looking for.
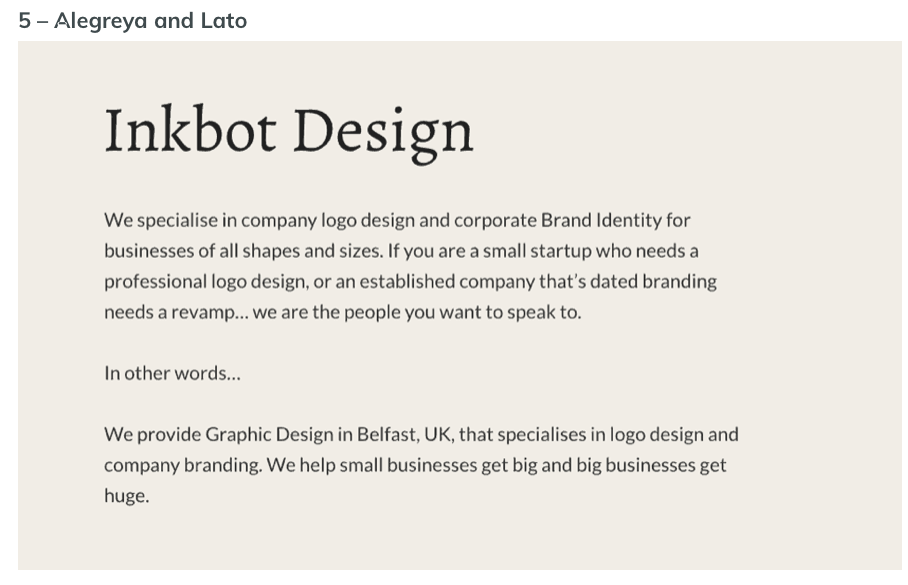
Typography
While you can use apps like Fontify to allow for using any font you want within Shopify — just the standard built in Google fonts are good enough for now.
You can use resources online to help you choose good font combinations such as this one.
I like the bold feel of this font combination.
Plug in your font choices within your Shopify settings and make to use the proper font for text and the heading font for your headings and accents.
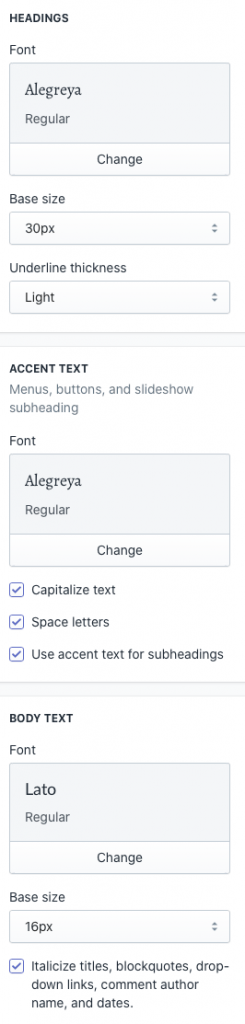
Remember as always, click on save on the top right when you are done.
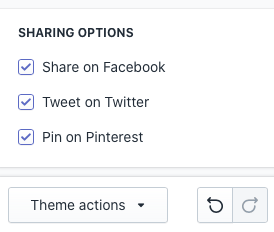
Enter Social Media Accounts
Next enter in all of your social media accounts in the social media section.
Also note on the bottom your sharing settings. I recommend keeping those all checked on.
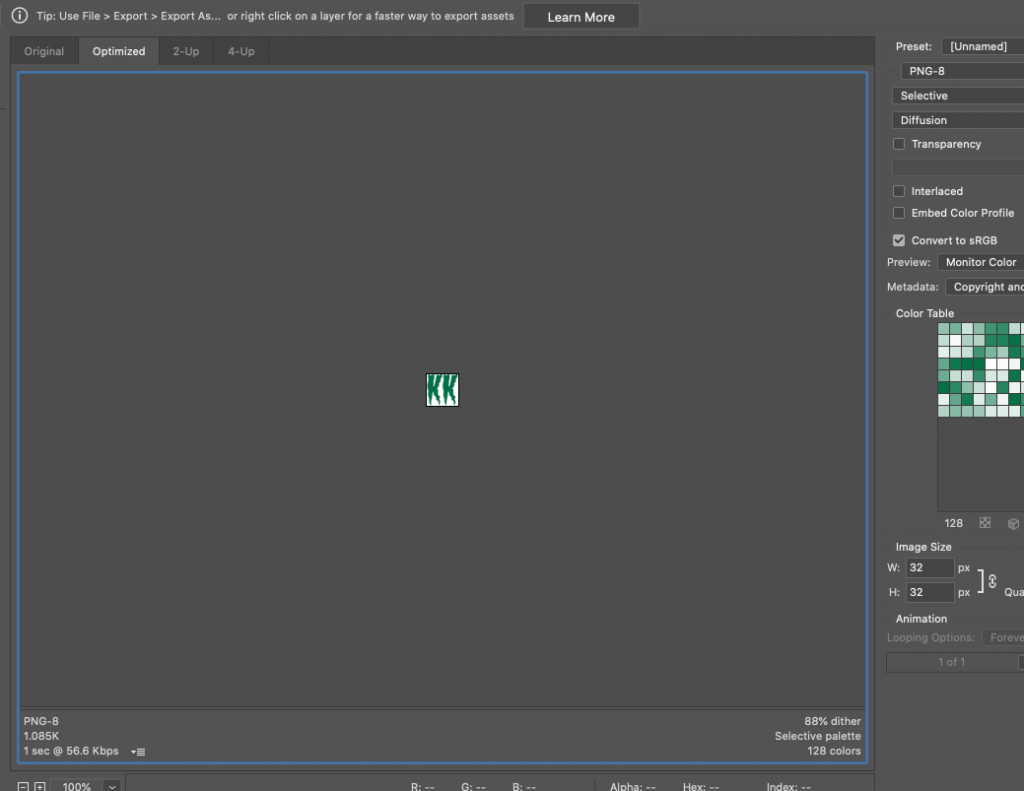
Favicon
Shopify will pair this image down to 32 x 32, so you may as well just create a 32 x 32 image.
I just choose a simple K&K from my text logo and scaled it down to 32 pixels in Photoshop.
Checkout
You are going to want to experiment later with how your checkout looks in desktop and mobile.
For now I am going to keep it simple and just apply my Kreepy text logo and the same graphic I used on the home page.
Click save and we can backout of this area.
Next click on the top left corner Shopify logo to go back to the main Shopify admin area.
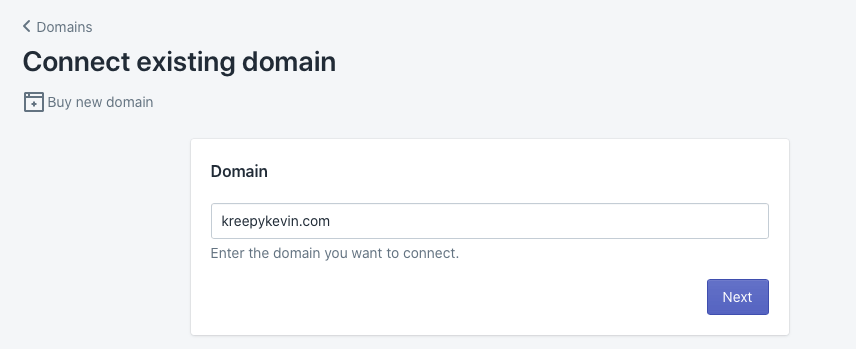
Connect Domain
We may as well at this time get our domain setup.
From the Shopify admin home you will find an add domain link. Just follow the instructions here.
Note you will need to make some changes on your domain hosting account also. Shopify has instructions on this.
Create Pages
Now that our branding is in place, let’s create some of the basic store pages.
You will want to think about what extra pages you need. Likely at a minimum you should have pages for these:
- About Us
- Contact Us
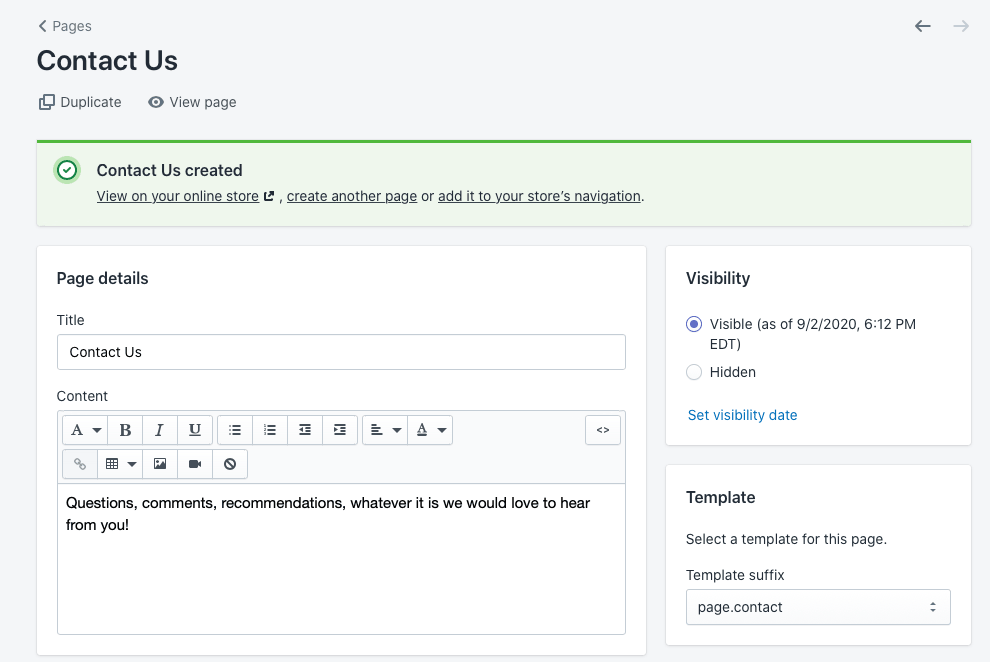
From the pages section click on the add page button.
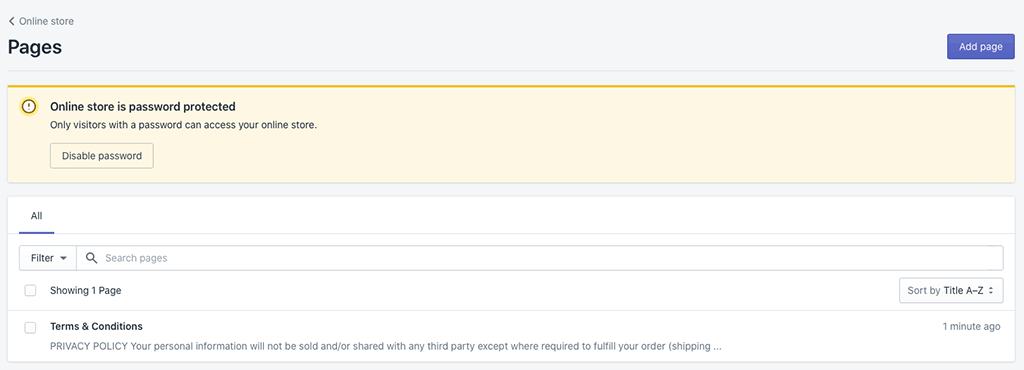
Note that Shopify has a built-in template to easily create a contact page with a web form — just use the contact template.
Do note that legal disclaimer pages are important too, but we will discuss how to easily create those later in this Shopify tutorial. Shopify has a special tool for creating those.
Adding Products
At this point to further test our Shopify store setup, it is going to be good to start adding some products so we can create categories and navigation.
One easy way for me to get some products in place will be to move over some items I have listed on Amazon.
Using JoeLister for Shopify I can easily move over some stuff that is a great fit for my store.
You can try JoeLister for free by signing up here.
And if it sells on Amazon no worries as the quantity will just go down accordingly to avoid overselling complications.
Going to my Amazon inventory page on JoeLister I can see that I have some DVDs that are horror & music related still for sale on Amazon.
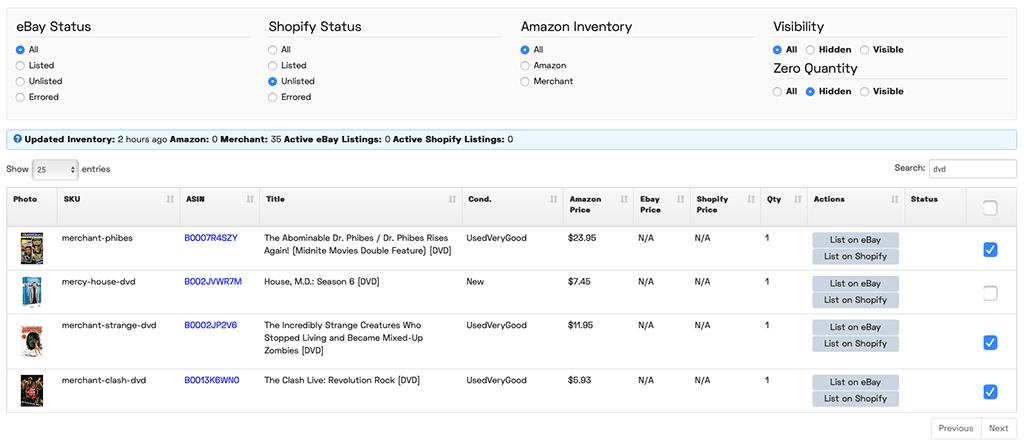
I just need to select those items and then choose List under Shopify in the bulk books menu.
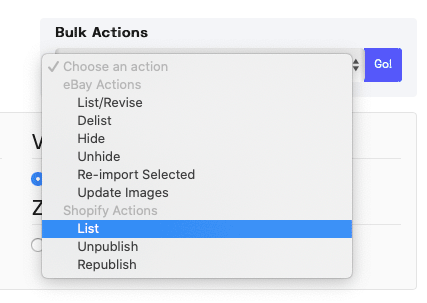
New Shopify products will instantly be created from the Amazon products in seconds. Nice!
Going to Shopify I now have 3 products in place. That was easy.

Now I am going to add some tags to give some meta data to these products.
First, I am going to tag them all as DVDs.
Then I will take two of them with a tag of Horror and the other with a tag of Music.
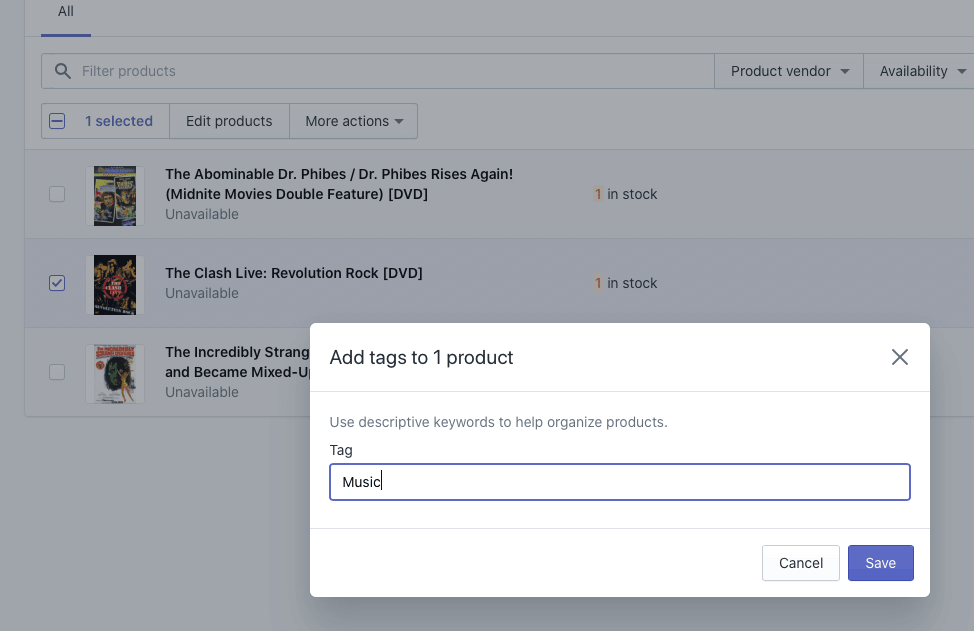
And the Dr. Phibes DVD I will also tag with Vincent Price as I think this may come in handy later.

Collections
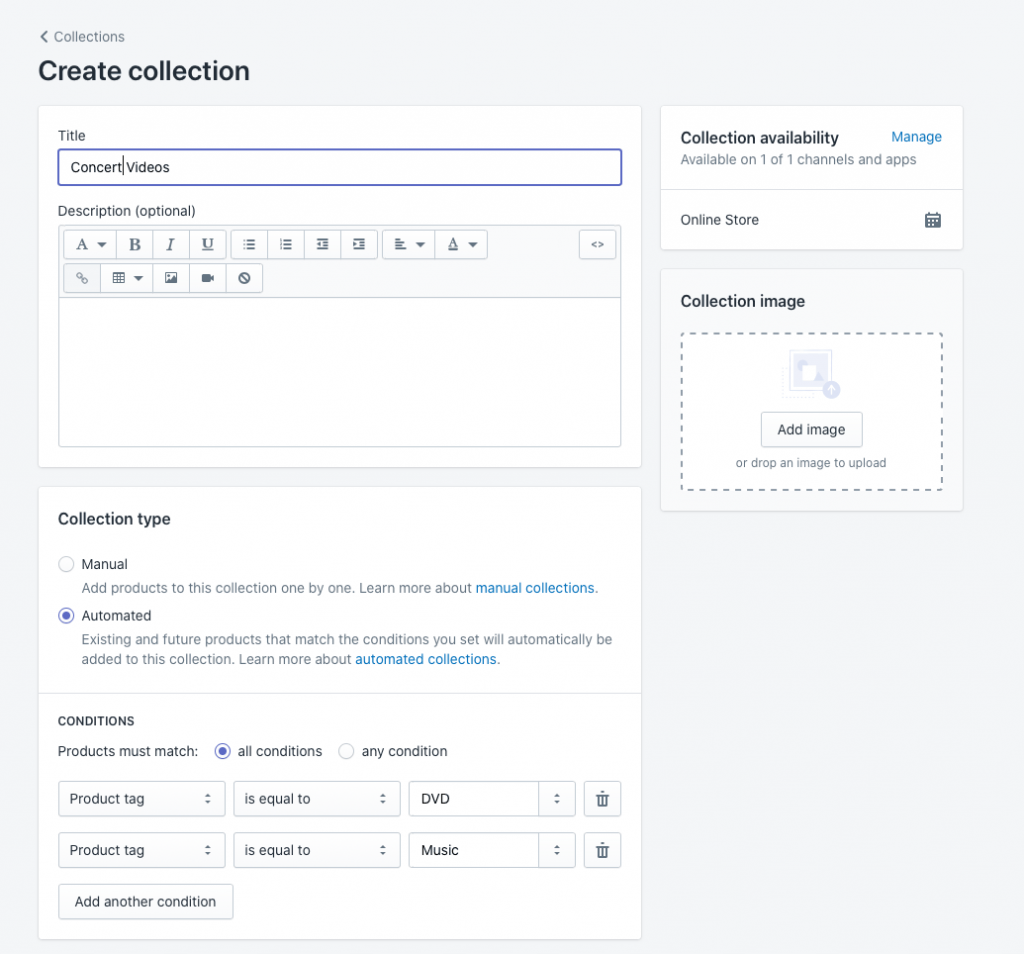
With products all tagged now things get a bit more interesting.
An important concept to detail in this Shopify tutorial is Shopify collections. Collections are like automated database queries to display a certain group of products in your Shopify store.
We can create collections in Shopify that tie together items based on the tags we associated with the products.
For example I created a category called Concert Videos which is anything that is a DVD tagged with Music.
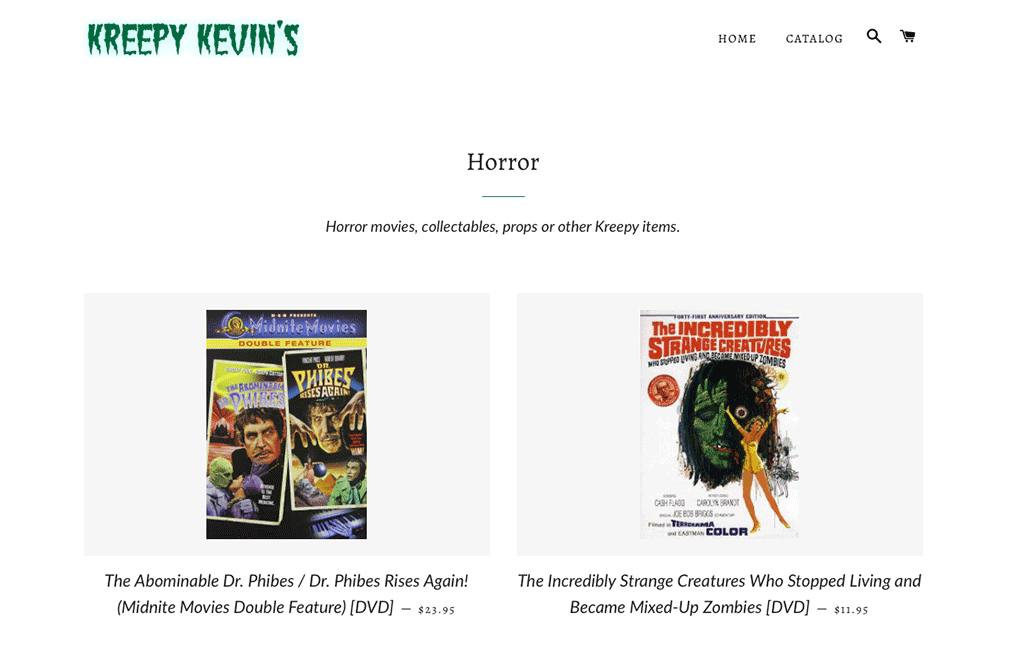
Let’s see how my Horror collection is working. It should be showing two products.
Go through and create collections for all of the main sections of your site — or any special featured collections you may want to feature on your store’s home page.
Navigation
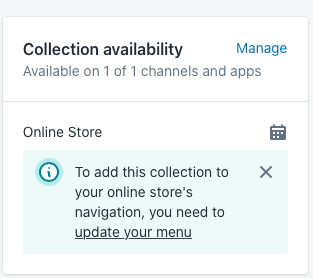
Once your basic collections and pages in place — you can edit your header and footer menus.
I am going to put collections in the header menu and pages in the footer menu.
You can get straight to your menu from collections, so let’s get started on that.
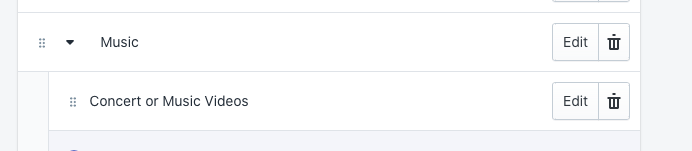
Also note that you can easily create nested menus. For me I created a main category called Music with a subcategory for Concert Videos by dragging the Concert Videos menu item over and under the Music one.
I finish my main menu and footer menu and things are looking good for a first version of the store.

I will simply add new collections and menu items under the Music and Horror categories as I add new kinds of products to the store.
Home Page Design
The core of my Shopify store is now in place and ready. I will now do some home page optimizations to create some impact to the home page.
Remember as you move forward with Shopify selling you will realize what your big sellers are and what categories consistently perform well. Those should be what you feature on your home page.
Let’s go back into the Shopify theme settings and finish up our home page look.
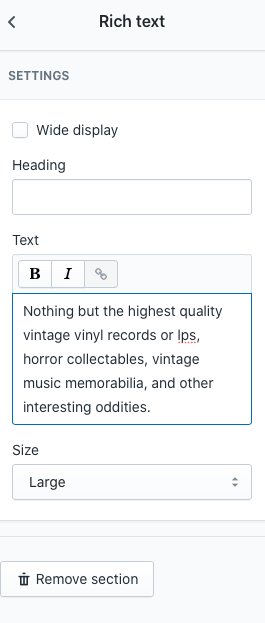
Rich Text
You can either decide to hide this or customize. I am going to use it for the SEO value. I am going to update this later after doing more SEO research, but this will work for now.
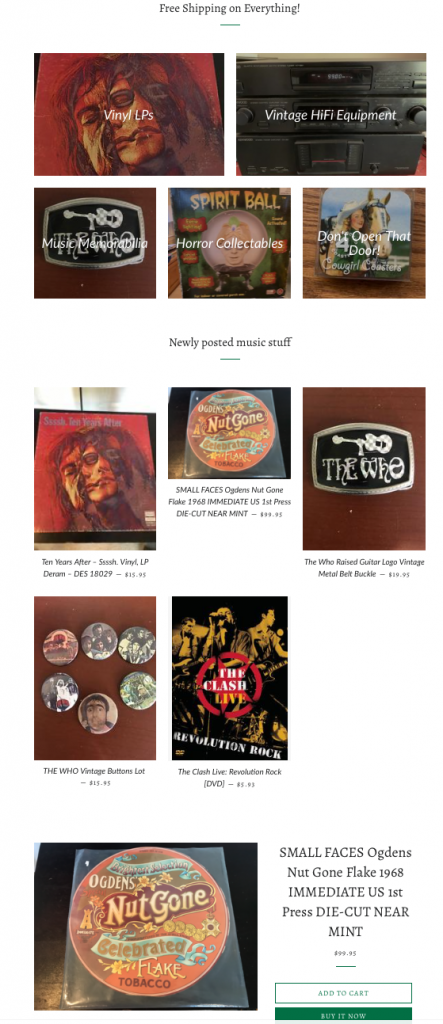
Feature Collections
Now plug in your collections that you want to feature on your Shopify store front page.
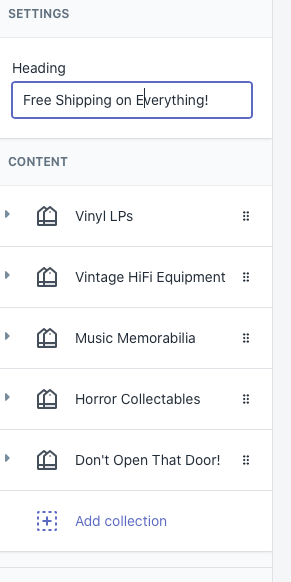
I choose mostly my main sections here and also wanted to make sure people knew that everything is free shipping.
This is how it is going to look:
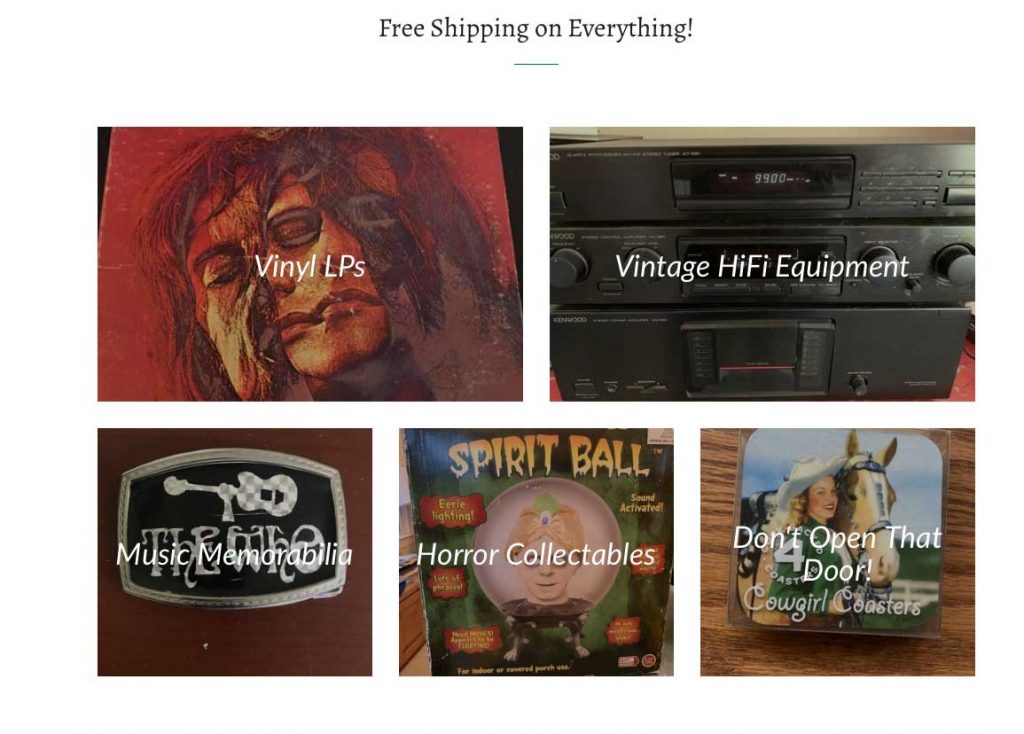
Pick a featured collection next. I choose music since that is going to be the main type of product.

Featured Product
Pick a really cool product that you want to feature on the home page.

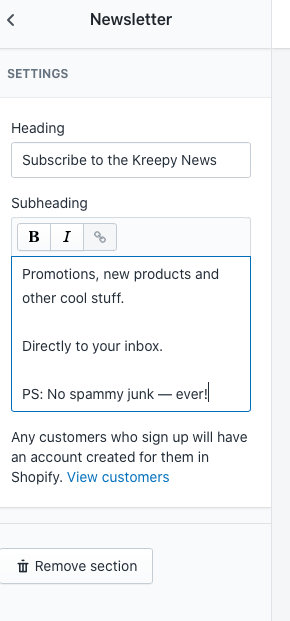
Newsletter Settings
Customize your newsletter settings and this is the final step here.
And now we have a very cool looking Shopify storefront!
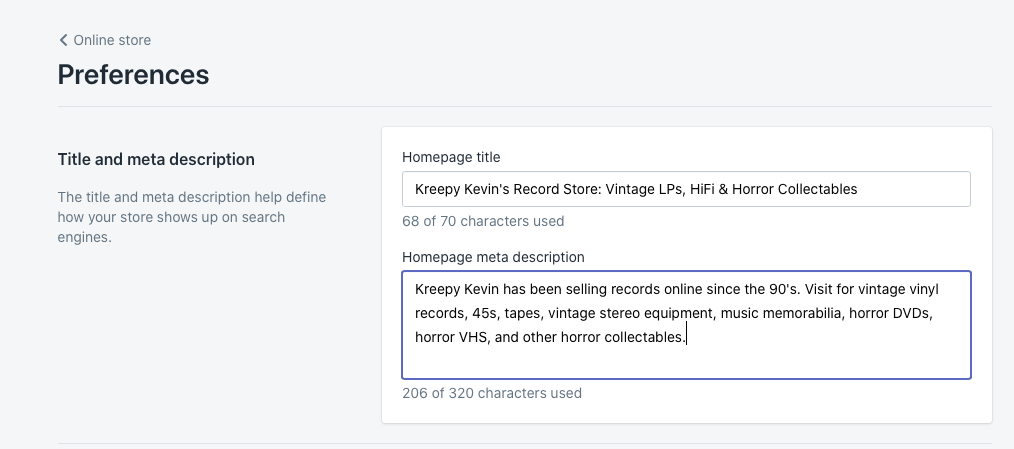
Shopify Store Preferences
Go back to the store settings and on the bottom is Preferences. Let’s work on that next.
Title and Meta Description
Take some care with these settings as this will impact your organic search results. This is how many will discover your new Shopify store for the very first time.
Social Sharing
Make sure you like the social sharing image you have in there, change as needed.

Tracking Setup
Set up your Google Analytics and Facebook Pixel in Shopify next if those are relevant to you.
These will help make your marketing efforts easier.
Shopify Settings
We still have some work to do with this Shopify setup checklist. We need to setup the core Shopify settings to finish everything up so we can launch this Shopify store for real.
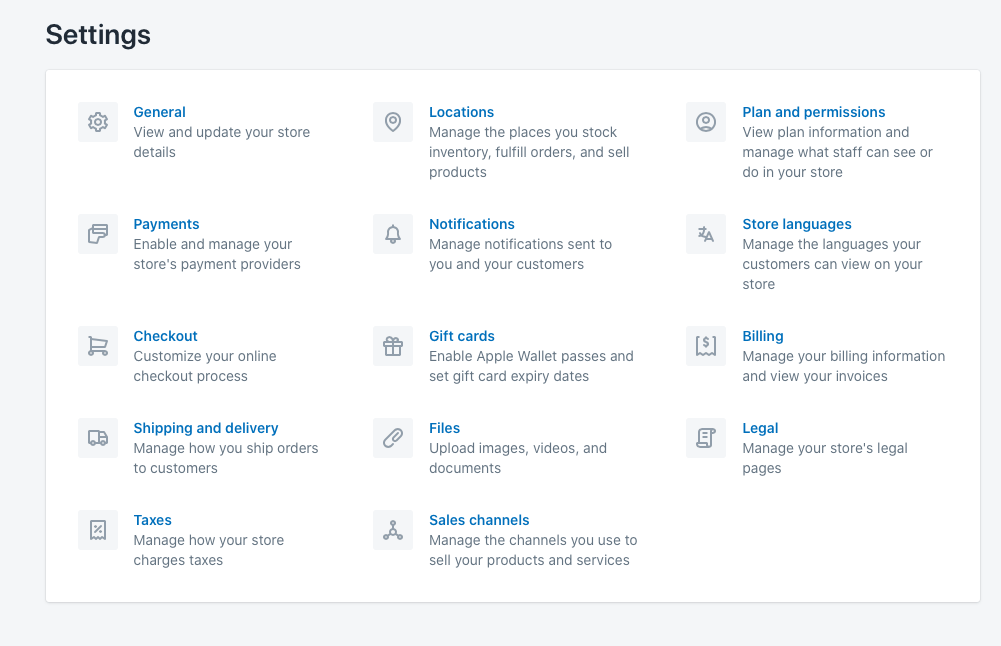
General Settings
These are commons sense settings I don’t think we need to review at all. Store name, address, legal name, time zone, etc. Easy enough.
Locations
Add the locations of your company and any shipping locations.
Plan and Permissions
Here you can add staff members who have access to your account. This is handy if you have assistants that will help you with your Shopify store.
Note you can also transfer ownership here should you ever sell your store.
Shopify Payments
You will need to click on the blue button to enter in your corporate and banking details, so payments go into your business account.
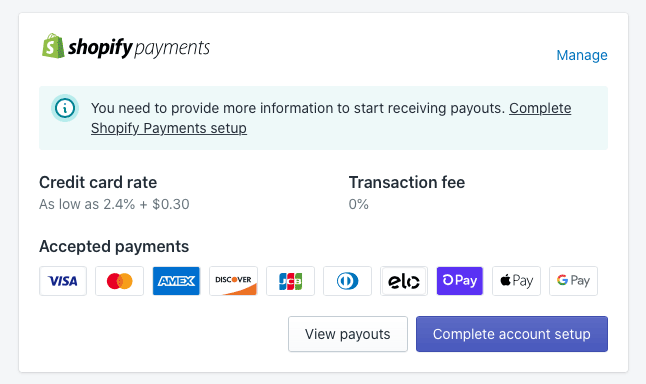
Also set up other Shopify payment options you want such as Amazon Pay.
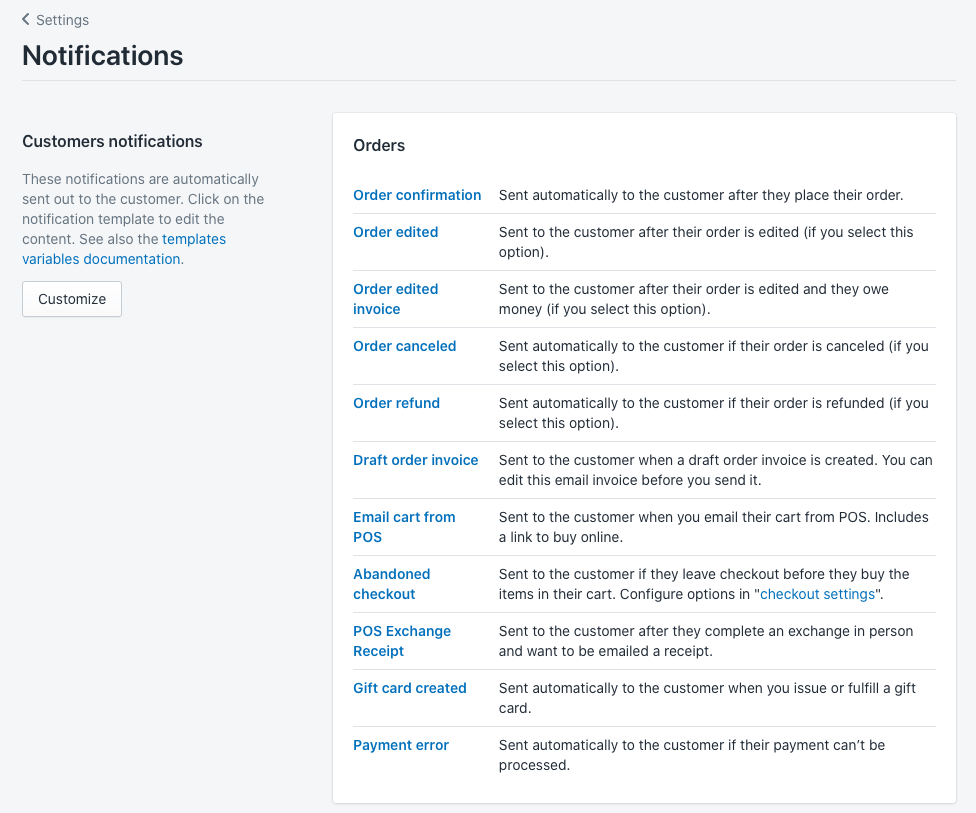
Notifications
This is where you indicate what notifications are sent to customers during the sales process. This is already setup by default by Shopify, but you can make changes here to disable or enable some notifications from the default setup.
Store Languages
If you want to support anything beyond English, do that here.
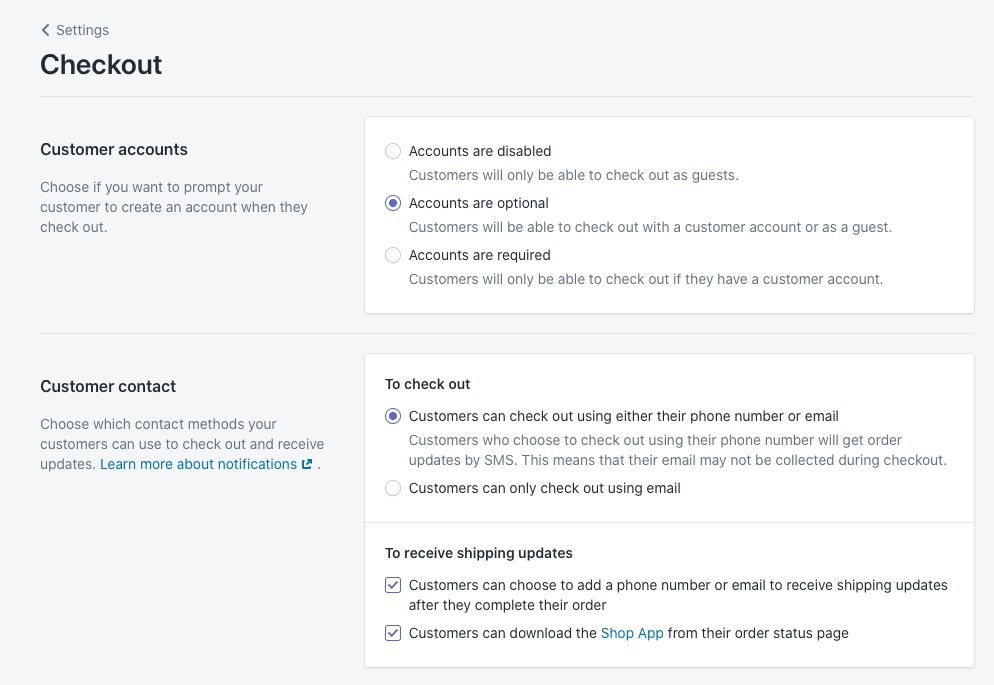
Checkout
You will want to review this one as I usually find a few of the default settings are not exactly to my liking and there are some vital settings nested within this section.
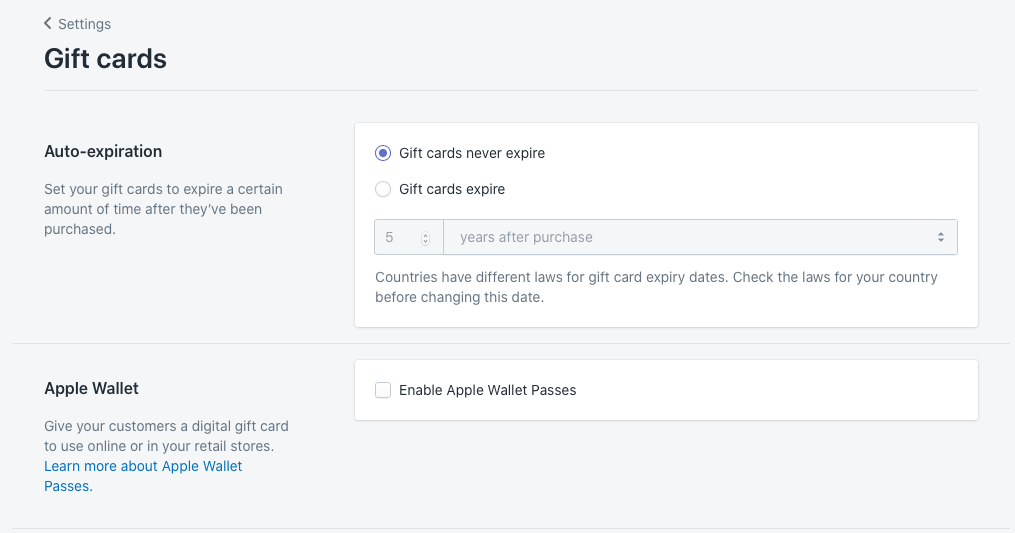
Gift Cards
Go here if you want to enable Apple Wallet or change expiration logic on gift cards.
Billing
Add your business credit card in here so Shopify can bill you as needed.
Shipping and Delivery
This is where you can indicate if you allow for in-person pickup, delivery, and also setup packing settings and other shipping settings.
Legal
Shopify has a great feature here where you can use templates to easily create important legal disclaimer pages for your Shopify store.
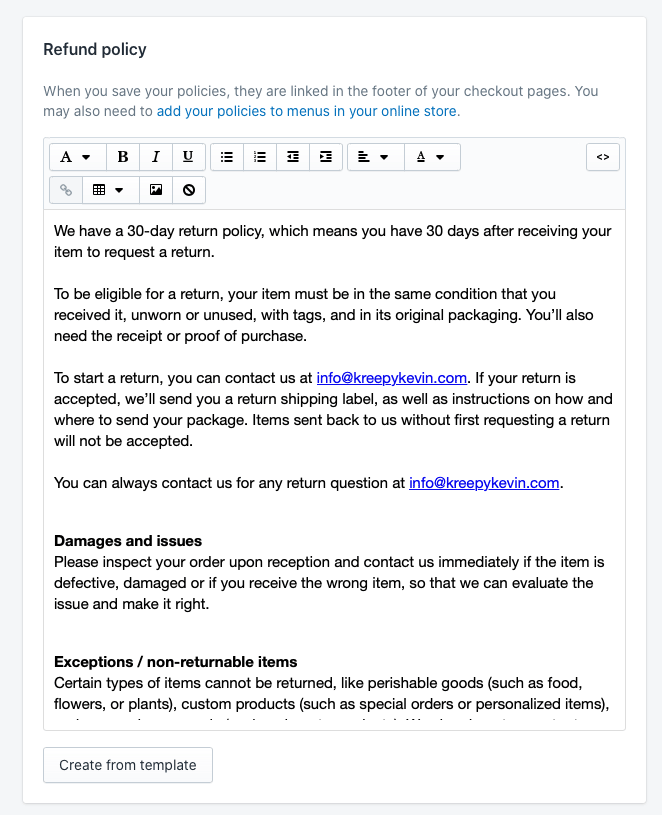
Review the text carefully and consult with your legal team as well. I recommend making a page for every suggestion Shopify makes — Refunds, Privacy, Terms, and Shipping.
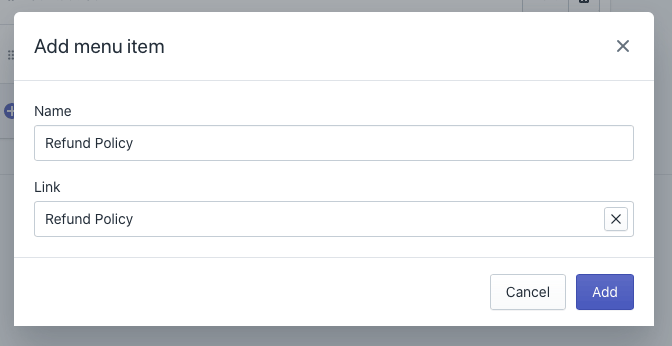
Note if you add pages here remember to change your navigation accordingly so your legal pages are displayed in the footer menu or elsewhere.
Taxes
Set up your taxes accordingly here by entering your state tax numbers and international tax settings.
Sales Channels
You can add extra sales channels as needed. I recommend in particular: Messenger, Google, Facebook, and Buy Button (if you have an external related website or blog).
Testing Your Store
Congrats you have gotten to the end of a nearly 3,000 word Shopify tutorial!
You now should be ready to roll with your Shopify store if you followed our Shopify setup steps.
But you still have one important task with your Shopify setup — testing.
I recommend viewing your store as a customer and browse around the store, add some products to the cart, and create a purchase.
Review the experience, the emails and notifications you receive and tweak as needed.
The easy way to do this is to setup test payments.
To setup testing go to Shopify Settings > Payments and click on the Manage link. Then on the bottom of the page you will see how you can enable test mode.

Shopify also has a detailed help page about setting up test payments.
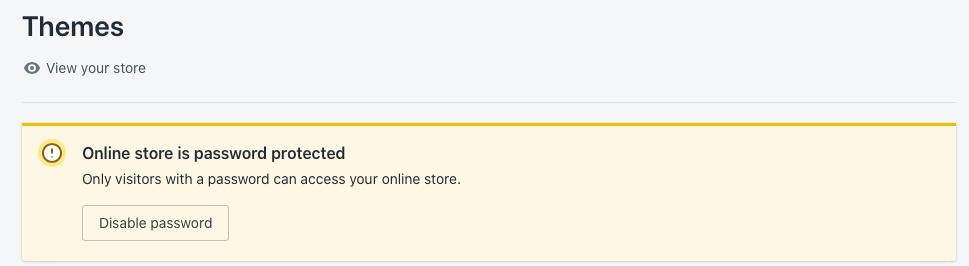
Once your store issues are all resolved make sure you disable the password protection feature (if enabled) and keep tabs on any incoming orders and emails to make sure everything is running smoothly.
Shopify Tutorial Conclusions
Selling on Shopify has a multitude of advantages for Amazon sellers. But launching your first Shopify store can be overwhelming for beginners.
I hope this Shopify tutorial helped you get through the process of setting up your Shopify store more smoothly.
In a future post we will detail Shopify store customizations and efforts related to marketing enhancements. So keep tabs on the JoeLister blog for additional Shopify guidance.
Are you an Amazon seller looking to easily move your product listings to Shopify? Sign up for a free trial of JoeLister for Shopify today.
* Please note we may include affiliate links in some posts. But only for products we use personally and have deep faith in.